Background & Introduction
When I started customizing, I went in fully aware that it is an addictive pursuit. This much I'd gleaned from all the reading and research I'd done online. What they'd failed to mention, however, was the itchy feeling you get in your palms when you're looking at your bits box and instead of random assortments of plastic, you see opportunities. In the aftermath of my Gordon Freeman custom, I was left with the following: Arctic Duke's paint-stained torso, arms and legs, Tunnel Rat's head and boots, Frontal Assault Duke's head, arms and legs, and Hi-Tech's torso.
Any normal person would look at that pile and see one failed customizing attempt, one quadriplegic and one elongated man with ill-fitting joints. I looked at that pile and saw the perfect companion piece for my Gordon Freeman custom. You'd better believe it, folks! Here comes...
A STEP-BY-STEP WALKTHROUGH
ON HOW I MADE MY CUSTOM
ADRIAN SHEPHARD
ACTION FIGURE
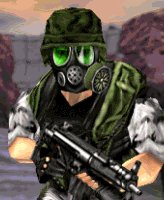
Those of you who are unfamiliar with the Half-Life saga will have absolutely no idea who this guys is:
He is, for all intents and purposes, the enemy. He's one of the many guys who spends the first three-quarters of Half-Life trying to kill you. He's intelligent, cunning and mute, much like Gordon. He's also the first Expansion Pack's player character as well as the perfect way to use my Arctic Duke bits.
Part 1 - Whiskey Tango Foxtrot
While partway through my second attempt at making my dream of a Gordon Freeman action figure a reality, I did an audit to figure out just how much he'd cost me. I came up with a figure in excess of $60. This was astronomically high, considering what I was getting out of it, and I glanced woefully at the dismembered toy parts littering my floor, cursing the fates for not telling me about acrylic paint sooner. I tried desperately to come up with some way to cut my losses, to salvage the parts into... something. I was holding the paint-stained Duke torso, when suddenly, the stains reminded me of urban camouflage. I thought to myself, Wait a sec... I know someone who wears urban camo! A quick flip through my CD-ROMs confirmed it, and the Adrian Shephard project was a go.
Since I was still not done my Gordon Freeman custom at this point, I didn't want to get sidetracked too much. I limited myself to mentally figuring out what parts to use and what to do about weapons. Parts-wise, I decided to swap the forearms of Jet-Wing Duke with Frontal Assault Duke to give me a set of bare forearms. Then, I'd just reassemble the Arctic Duke but use Tunnel Rat's boots since the original boots had been donated to another figure already. I'd custom sculpt the gas mask and helmet with Craft Porcelain, add some paint and voila!
The weapon, on the other hand, posed a bit more of a challenge. I wanted something genuine and faithful to the game, which ruled out most, if not all, of the Sigma Six arsenal. Game-accurate weaponry meant I'd need an MP5-N submachine gun, fitted with an underslung M203 grenade launcher. I'd seen people use 1:6 scale weaponry on Sigmas but that didn't really jive with me. It seemed too easy, almost like cheating. Besides, anything larger than a handgun always looked comically oversized, and even if the scale were right, the MP5/M203 combination didn't exist in the real world. Either way, I'd have to make it myself.
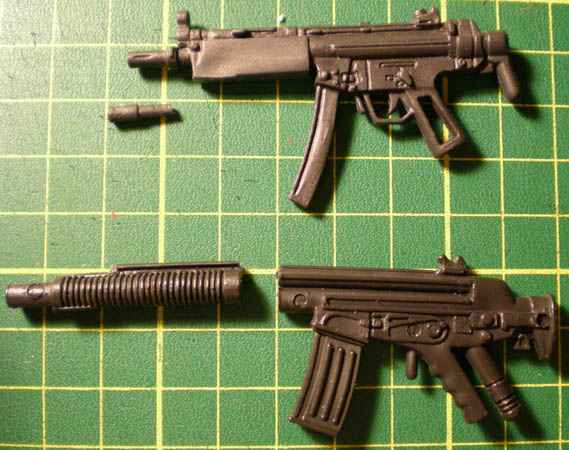
I didn't want to do it from scratch, though, so I was rooting around in one of my bins of miscellaneous action figures when I found the perfect weapon. It belonged to a 3-3/4" SWAT team figure I'd bought from a dollar store somewhere but was way too big for the figure it came with. I put it in Duke's hands to test it out. It fit!
Along with the nearly scale-perfect MP5, I found another gun from the same line that wasn't modelled after a specific gun, but had similar enough features that parts could be interchanged. The thick barrel of the second gun could be used for the grenade launcher.
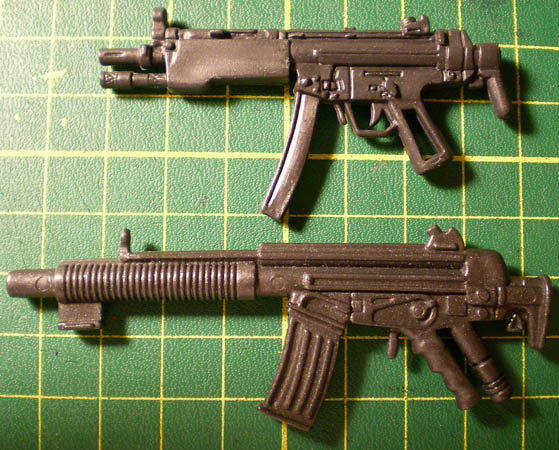
Using my trusty X-Acto knife, I cut the flashlight and bottom handguard off of the MP5, along with the barrel from the second gun. I shaved down the superfluous parts and sanded them smooth.
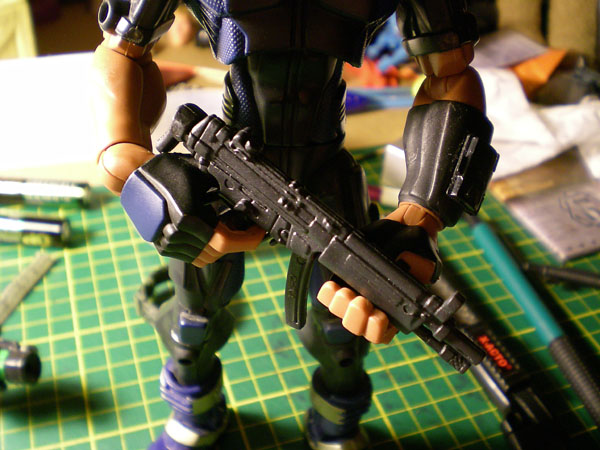
Next came a test-fit, to see how the final product would look.
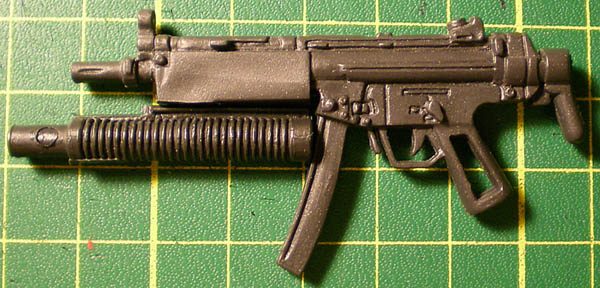
Then, with a little help from my good friend 5-Minute Epoxy, I bonded the two parts together permanently.
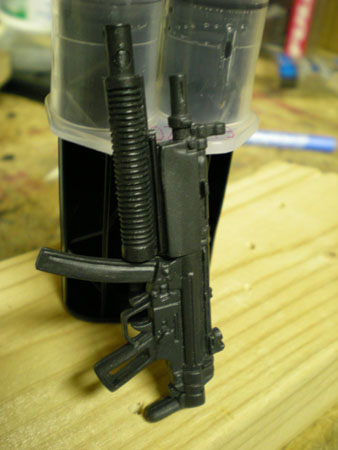
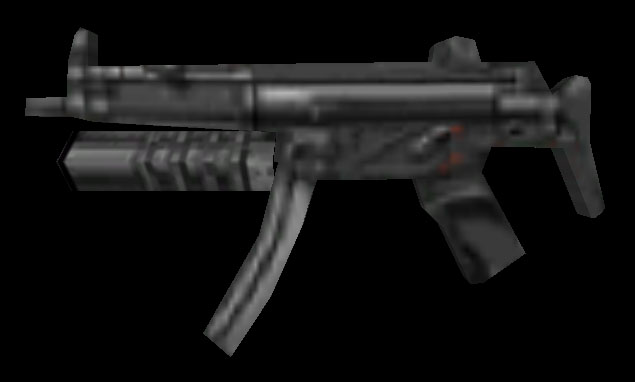
Not bad, eh? The image on the right is the in-game model. The launcher on mine's a bit too long, but I'm keeping it that way because it makes the entire gun look bigger in Duke's hands.
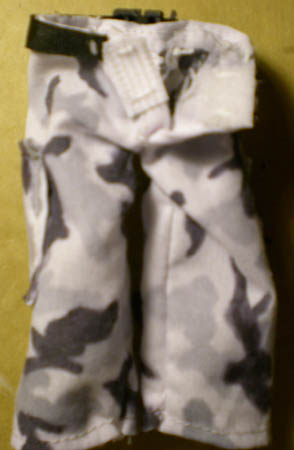
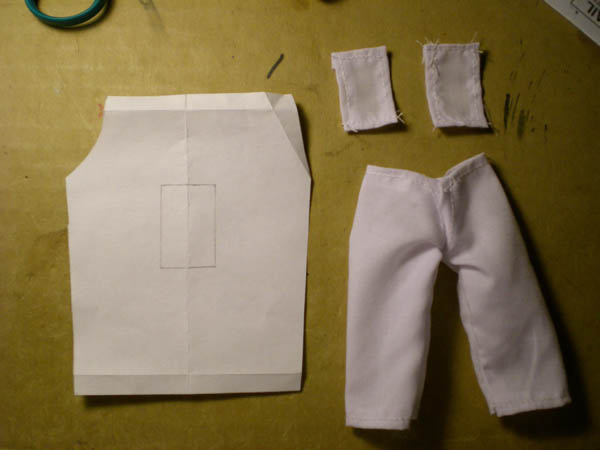
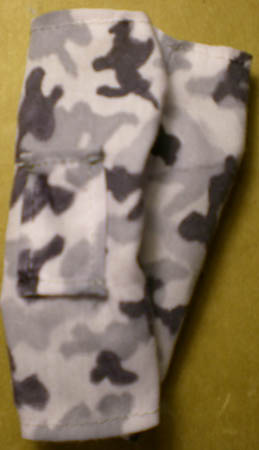
Once the gun was taken care of, I set about making a pair of cloth pants. I went downtown and bought some cheap white broadcloth ($2.50 CDN/yard), made a paper pattern and got my mum to help me sew them up. I would've done it myself, but I didn't want to screw up too many times before getting it right, so I bowed to her experience.
Then, I used some Prismacolor and BiC markers to make the urban camo pattern. I used a black BiC permanent marker first to make the anchor points.
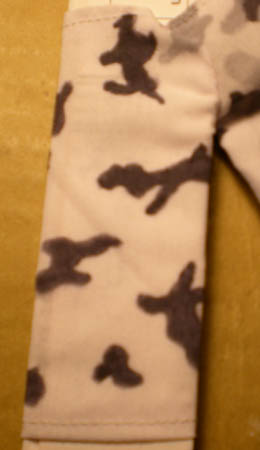
Next, a Prismacolor 50% Cool Grey made the grey spots.
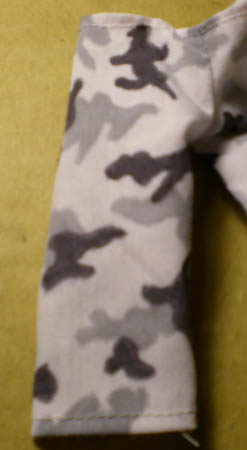
I decided that I needed a little more contrast, so I used a Prismacolor 30% Cool Grey to fill in some of the negative space. Through experimenting, I found that the 30% and the 50% were too similar in shade when used on cloth, so to lighten the 30%, I flipped the pants inside out and drew on the reverse side of the fabric.
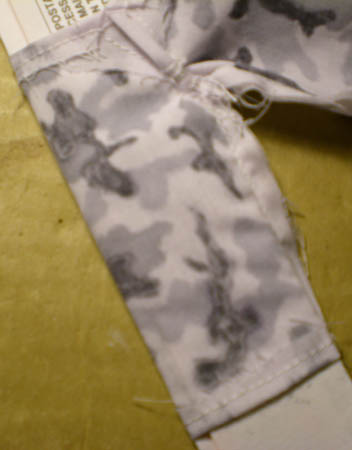
Afterwards, I sewed the cargo pockets onto the pants...
... Added a belt, made out of a 1:6 scale buckle and some nylon tape...
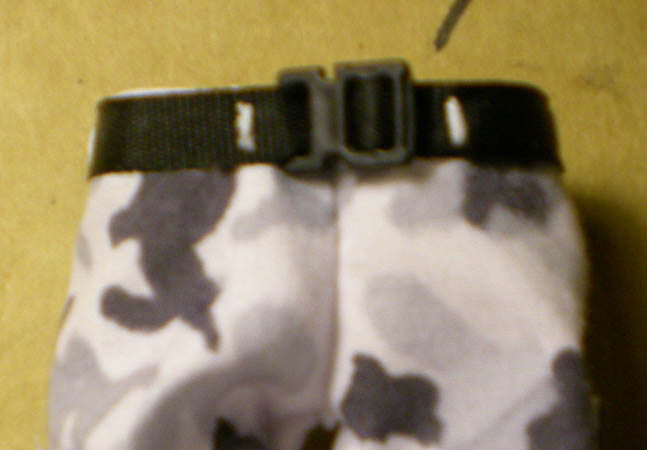
... And installed hook-and-loop tape at the back to close it.