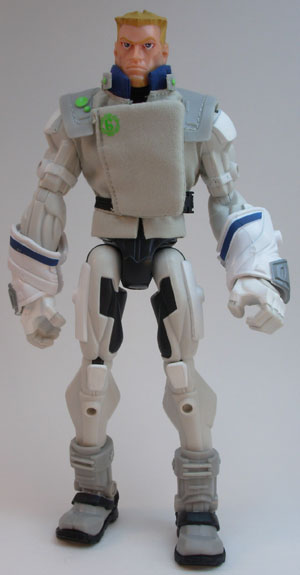
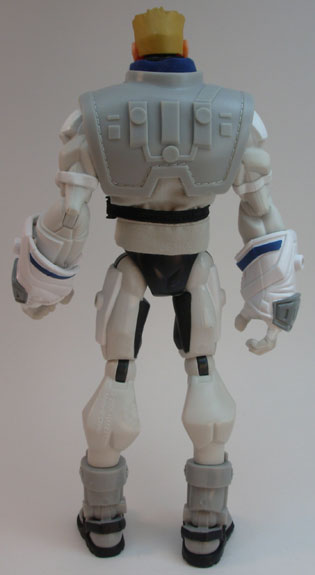
Okay, so I started with this, a stock, off-the-shelf, 8” scale Arctic Duke figure.
*These images courtesy of Joe Central
Ideally, I’d have liked to use a Frontal Assault Duke, but this figure isn’t readily available in Canada for the price I’m willing to pay. But, the boots on that figure look more integrated with the rest of the suit, and it’s already mostly black anyhow, which would save a LOT of brushwork and a lot of paint. However, the lower legs on the Frontal Assault Duke are not poseable like on the Arctic Duke, and he also has a painted-on five o’clock shadow that might make the end result look sloppy. Still, another option would be to take a Hi-Tech body and swap Duke’s head onto it, that would work even better. But, this one was ten bucks, so really there was no question.
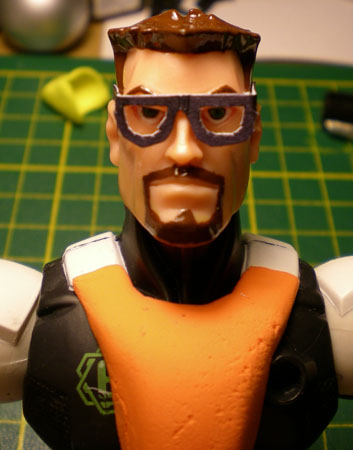
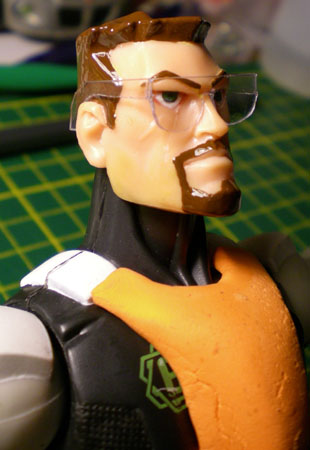
Anyway, as soon as I brought the figure home, I decided to see if my judgment regarding facial resemblance was accurate. I got a picture of Arctic Duke from Joe Central (Very good site, by the way, with thorough reviews of all the toys) and brought it into Photoshop. A few minutes of tweaking colour balances later, I came up with this:
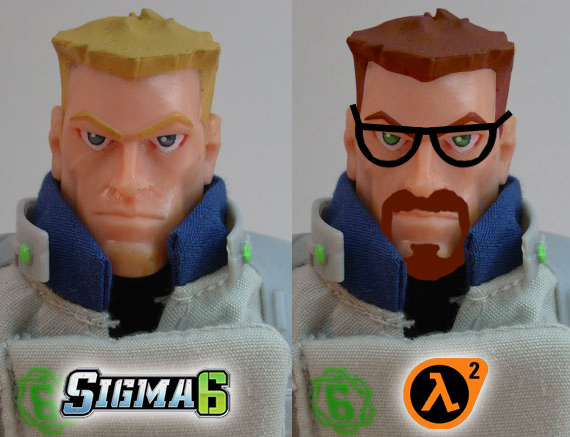
Not a bad resemblance. This might actually work. The first thing I did was mask off the neck area and paint the hair.

I used Testors #1133 Light Brown. It’s way too shiny for my liking, but then again, you get what you pay for. Better quality paint might yield better results. Next, I painted the goatee using the same colour and a tiny, Gold Sable liner brush. For the eyes, I used Testors #1164 Flat Green and very carefully dotted paint over the original blue. The pupils were done with an Ultra Fine Point Sharpie marker.
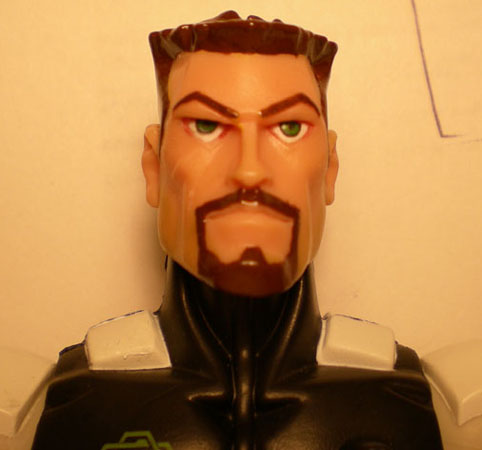
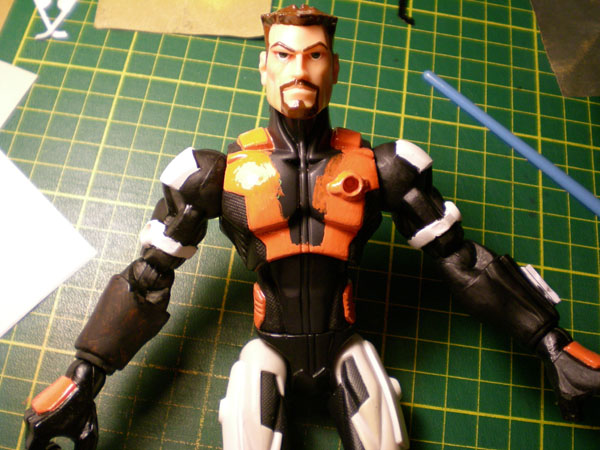
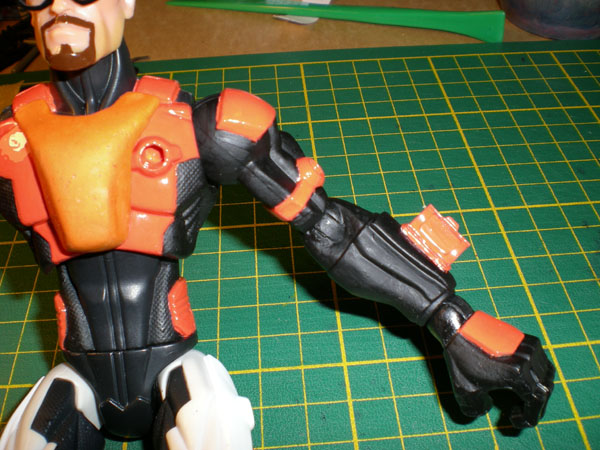
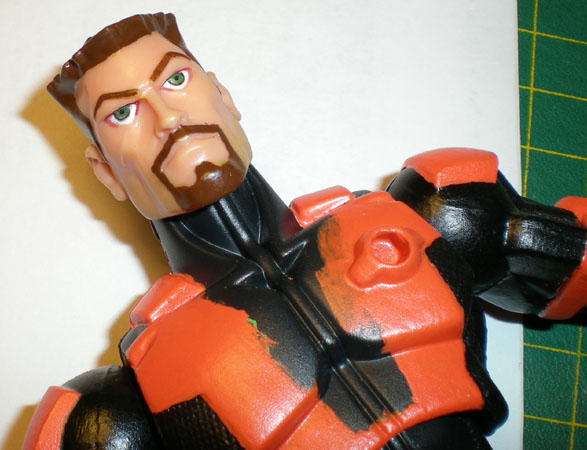
Now, it was time to test out the orange paint I got for the HEV suit’s signature colour. Testors #1127 Orange worked beautifully on the inconspicuous spot that I tested it on.
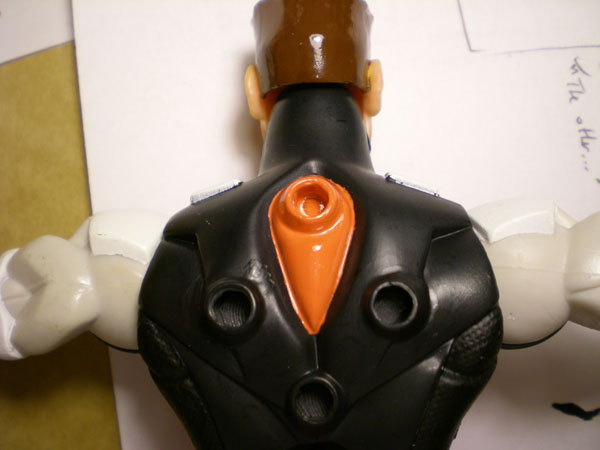
I don’t mind the shininess so much for the orange bits, since they’re supposed to look like plastic/composite anyway. It took a few coats of orange to cover up the black underneath. Oh, I almost forgot, the textured underarms on the figure were originally white. I used Testors #1149 Flat Black on them and they almost look like the figure came that way. I’m very pleased with how it turned out.
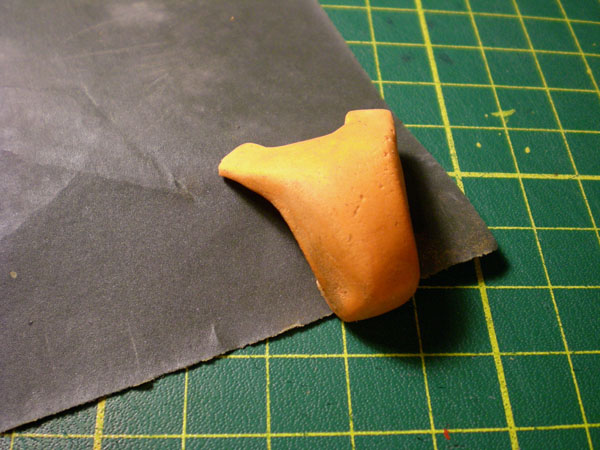
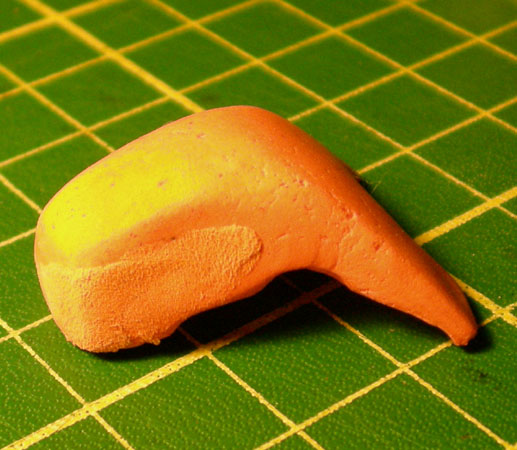
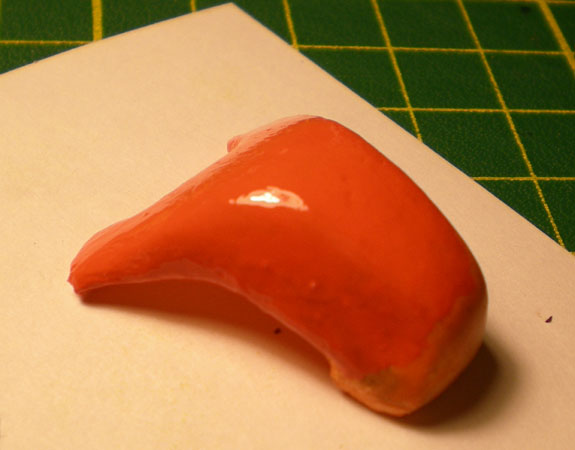
Once I was satisfied that the paint would look good on the figure, I turned my attention to sculpting the bits of the HEV suit that aren’t present on the Sigma suit. All things considered, the Sigma suit is a pretty good base, and has the same sci-fi-but-grounded-in-reality look of the Half-Life series. I used some orange Crayola Model Magic to make a chest-piece, as well as to make a gauntlet for the right arm.
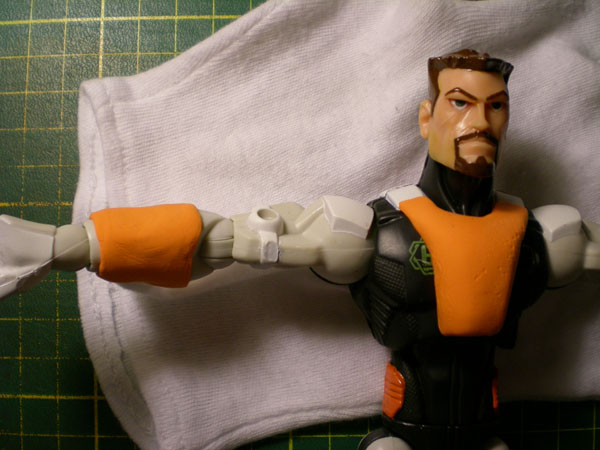
Of course, the orange of the Model Magic wasn’t the same shade as the paint, so it was painted later.
I originally chose to use Model Magic for a few reasons. First, it’s cheap. A packet of the stuff costs pennies in comparison to premium materials like Sculpey. Secondly, it air-dries. I found this preferable to Sculpey as well, since the thought of the figure melting in the oven didn’t appeal to me. Lastly, I chose Model Magic because it’s easy to work with. I’d considered trying two-part air-drying modeling compounds like Miliput or Aves Apoxie, but I couldn’t find them in any of the art stores I went to. Also, from reading reviews online, I found the consensus was that they’re difficult and messy to work with. And you have to work fast before they dry. With Model Magic, you trade durability for ease and cleanliness of use.
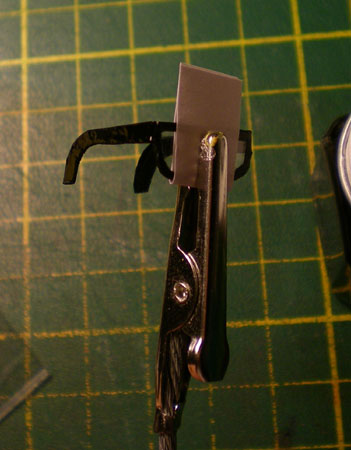
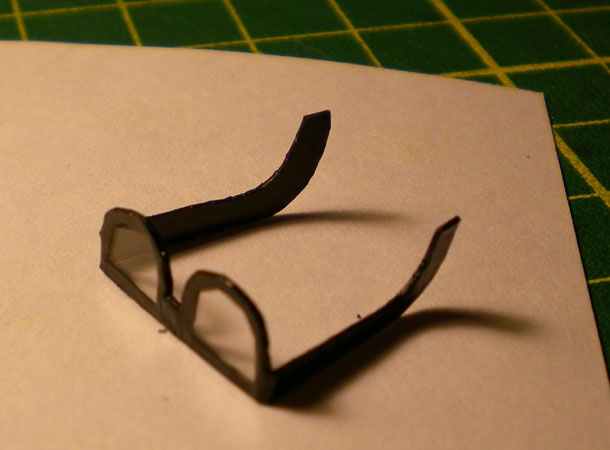
While I was waiting for the Model Magic to dry (it takes 24 hours according to the package), I decided to make Gordon’s glasses. I made a test pair out of cardstock and used a permanent marker to colour them black.
When I was happy with the size, shape and fit, I made the desired modifications and cut out a master pattern using the cardstock. I then traced this pattern using a Sharpie onto the plastic that came as the figure’s packaging.
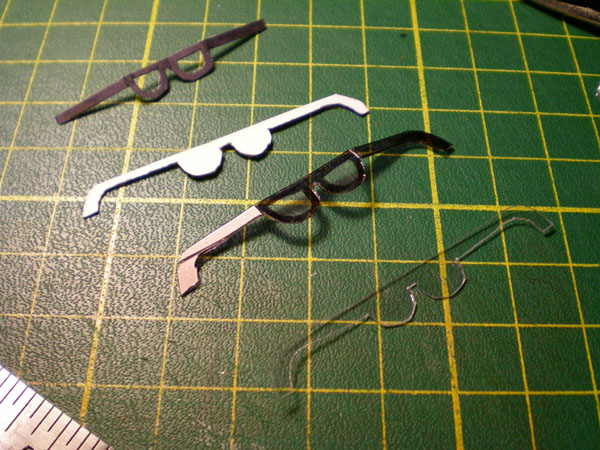
Recycling this way makes me feel a bit better about the ludicrous amounts of packaging a Sigma Six figure comes with. Anyway, as you can see from the third pair in the above image, I kind of screwed up the first one when my knife slipped and I ended up with a deep score along one of the frame’s arms. I ran with it anyway, and found that the proportions were a bit off, so I modified the design and tried again. This time, they fit perfectly.
Also, a tip for if you’re working with sheet plastic, don’t fold it because it’ll stress and shoot spider-webs of opaque white through the piece, which ruins the effect. Instead, score (make a light, shallow cut that doesn’t go through the material) the side opposite of the way you want the bend to go, so that when you bend it, it eases the stress on the material and also gives a cleaner edge.
Painting the glasses wasn’t too difficult. Using the smallest brush I had, I outlined the frames using Flat Black, then when they had dried, went over that layer with Testors #1147 Gloss Black. The end result is what you see here, a pair of rather convincing-looking glasses, complete with transparent lenses.
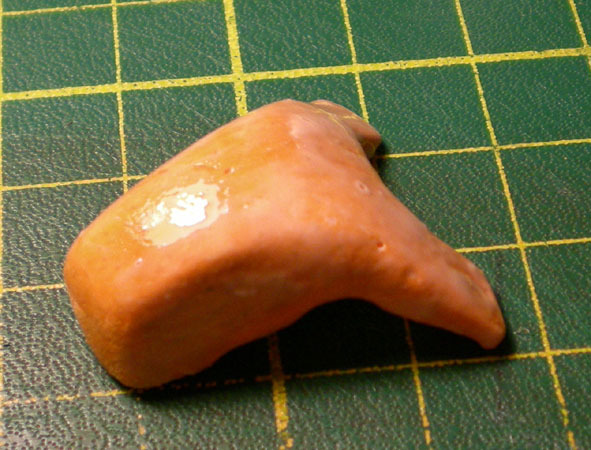
By the time I’d finished the glasses, the Model Magic pieces had dried and I was ready to sand them into the proper shape. Using extra fine 600-grit sandpaper, I smoothed out the cracks and imperfections as best I could.
Those I couldn’t sand out, I filled in with a wet concoction of Model Magic that I made by storing it in a Ziplock bag with a little bit of water for a few days.
When the filler had dried, I sanded it some more. At this point, I had to think ahead to what I would do to seal the figure once I had finished painting it, since the paint kept chipping off and I had to reapply every few hours. I figured I’d use some Krylon clear coat spray, but aerosol sprays have a habit of melting foam, of which Model Magic is made. To test this out, I took a separate piece of Model Magic and used the spray on it. It didn’t seem to do anything to the foam, which was good. However, to be extra safe, I mixed up a batch of sealer, made simply by taking some white glue and adding some water, and brushed it onto the finished piece to protect it.
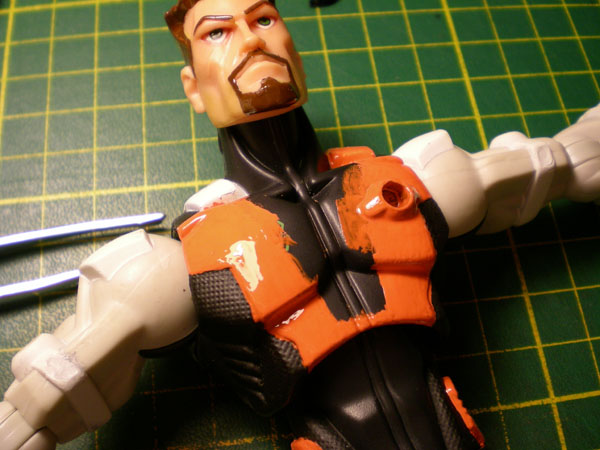
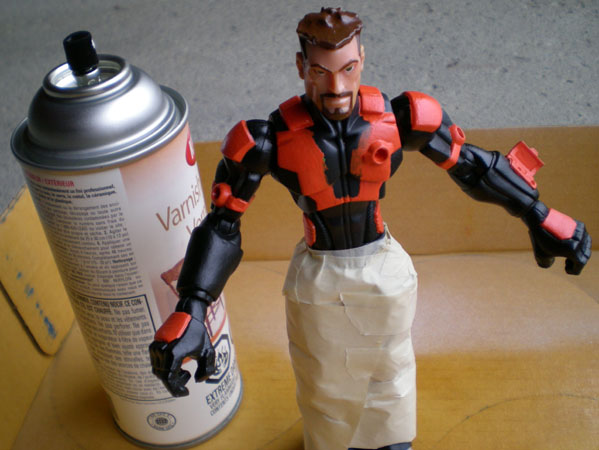
While that was drying, I started painting the rest of the figure. First up was the chest, painting the parts that weren’t covered by the chest piece.
Next came the hands…
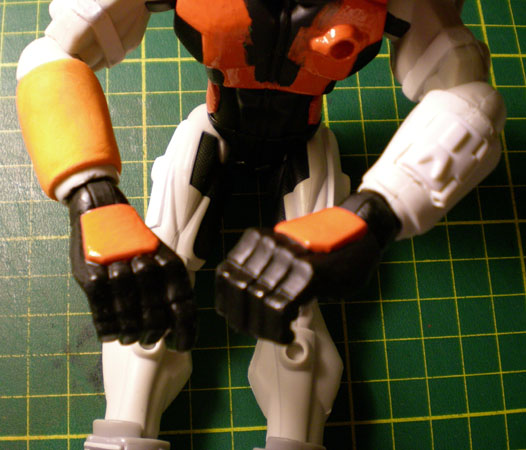
… Arms…
… And the chest piece…
At this point, I decided to spray the top half of the body with Krylon Clear Satin Varnish Spray, since I was tired of constantly reapplying paint. Now remember, if you’re going to do this at home, spray only in a well-ventilated area. I masked off the lower half of the body, took everything out to my garage and sprayed the figure thoroughly from about a foot away, to get nice, even coverage. The beauty of using a satin-finish spray is the nice, consistent luster it gives the figure. In this case, the hair that I thought was too shiny was dulled to an acceptable level.
