Background & Introduction
With my Gordon Freeman custom completed and with my Adrian Shephard custom already underway, my inner (okay, not-so-inner) completist started to reach out and nag me about my set missing one crucial piece. After all, I'd already gotten two-thirds of the way towards realizing all the protagonists of the first generation of games in action figure form, so why stop there? It would be an injustice, nay, a downright travesty not to go three for three! So, once again, I knuckled under the pressure of my own obsession and decided to put together...
A STEP-BY-STEP WALKTHROUGH
ON HOW I MADE MY CUSTOM
BARNEY CALHOUN
ACTION FIGURE
Part 1 - "Hey, catch me later..."
Anybody who's played Half-Life will never forget this loveable, affable and utterly expendable class of security guards that can be found all throughout the Black Mesa Research Facility. Known collectively as "Barneys," it wasn't until the second stand-alone Expansion Pack that they finally got a starring role. Slipping into the boots of Barney Calhoun, a mid-level security guard, the player was tasked with fighting his way through Black Mesa and ultimately escaping the doomed facility.
As with the other two figures in this line, I decided to go with a re-imagined Half-Life 1 era look, which meant combat boots, navy blue trousers, a blue shirt, an armoured vest and a helmet. With no way to make my own molded, flexible rubber parts, I figured early on that I'd have to make a lot of cloth accessories like I did for Adrian Shephard. The pants would be simple enough, just reusing the pattern I'd made for Shephard's pants, but the shirt and armour would be more of a challenge. I decided to shelve that problem for later, and concentrate on finding the raw materials I'd need for the figure itself first.
I took another trip to the toy warehouse (I swear, that place must have gotten a crapload of revenue off me alone) looking for a Tunnel Rat and a Hi-Tech figure. I wanted some visual contrast between this figure and the other two, which were much more buff and muscular, so I figured Tunnel Rat's body would do nicely. As for the head, I didn't really have a choice since all the other figures they had either wore masks or were otherwise inappropriate. Hi-Tech, with his hair and eyebrows painted black, would do. While the hairstyle would be all wrong, the facial structure was close enough and the helmet would hide the hair and that weird black band at the back of the head for the most part. Besides, I didn't want to use yet another Duke head.
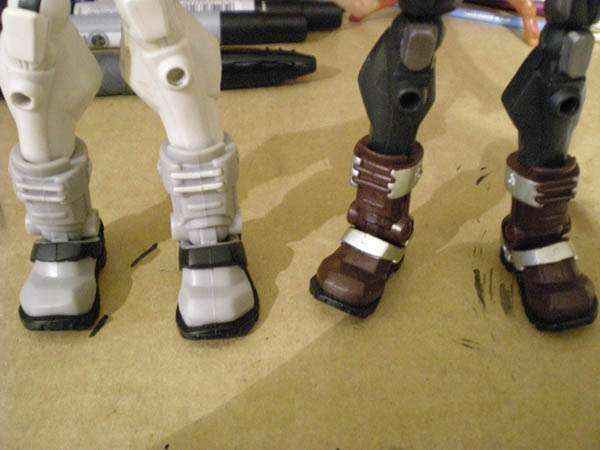
Unfortunately, they were all sold out of Tunnel Rats and while they still had plenty of Hi-Techs, I figured I'd save my ten bucks and just convert the Kamikaze custom I'd made earlier. I boiled and popped his grey boots off and replaced them with the original brown Tunnel Rat boots, and gave the grey ones back to the Arctic Duke I was using for Adrian Shephard.
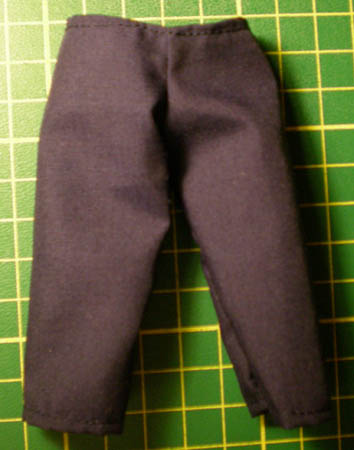
Then, I got my mum to help me with the pants again, but this time without the cargo pockets.
After that, I started looking for weapons and gear. Since I'd used an MP5N for Adrian, that meant I'd have to stick with pre-High Definition Pack weapons for the sake of consistency. Luckily, I found a simple, plastic 1:6 scale Glock 17 that would work beautifully. And before you criticize me for hypocracy, yes, I've always maintained that 1:6 scale long-arms (like rifles, shotguns and submachine guns) look funny when held by Sigma 6 figures. But, handguns tend to be okay because a) they're usually undersized for their alleged scale and b) Sigma 6 figures have hands that are disproportionately large for their bodies, usually 10-20% larger than normal. So, nyah!
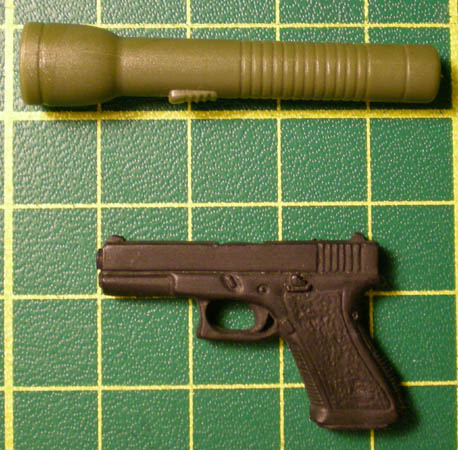
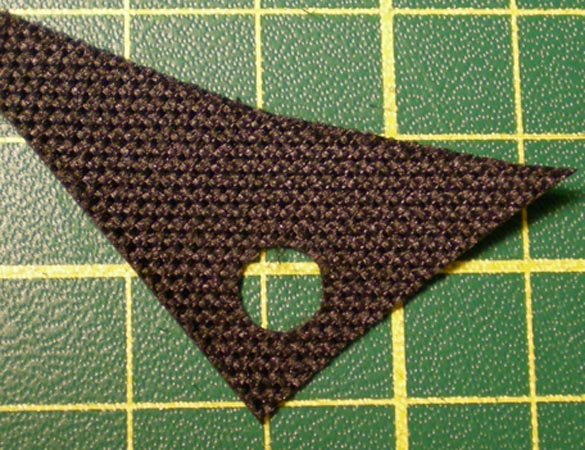
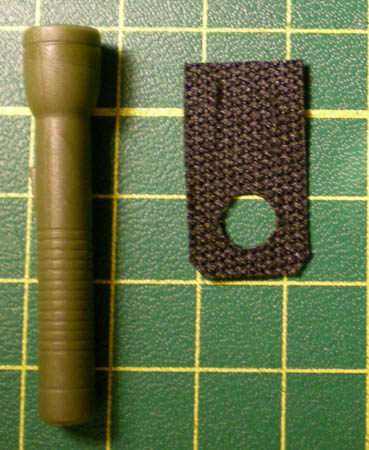
Anyway, along with the Glock, I found a large, MagLite-style flashlight that fit well in Barney's hand so I took that too. I'm not sure if we ever see him using one in the game, but it makes sense to have it, since when playing, you have a light available to you and yet you aren't wearing an HEV suit. I made a holster for it using a little trick I learned from my time as a Cub Scout. I took some heavy-duty nylon and punched a hole in it using a standard office hole-punch.
Then, I cut two slits above the hole so that it could slide onto the belt I was planning to use.
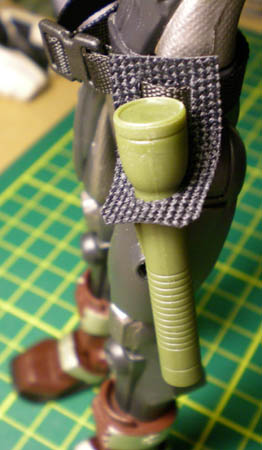
The hilt of the flashlight fits just perfectly into the hole I punched, and with the entire assembly attached to the belt, Barney can have his flashlight accessible at all times.
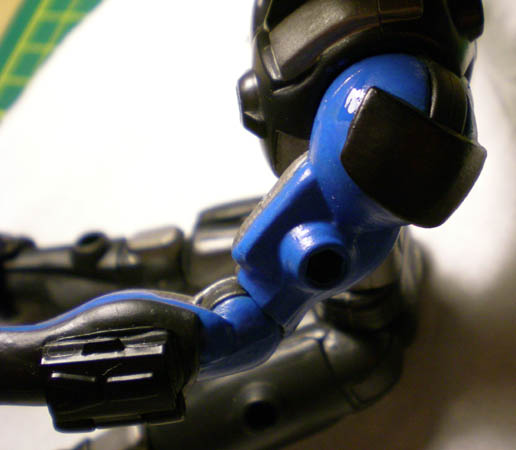
Then, I started painting. I used Tamiya Color X-14 Sky Blue for the upper body, and left the underarms that were painted with Citadel Colour 61-57 'Boltgun Metal' the way they were.
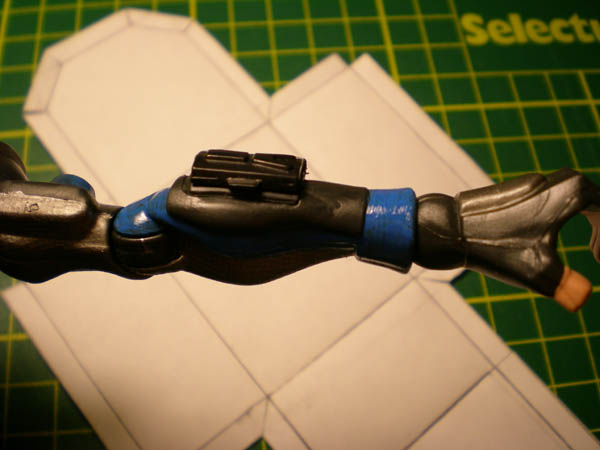
I also painted the shoulder armour with Citadel Colour 61-51 'Chaos Black'...
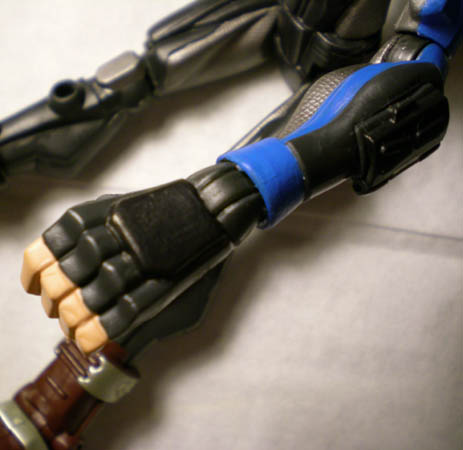
... Along with the back of the hands.
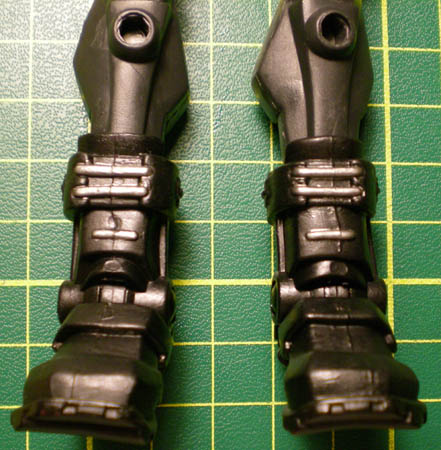
I painted the boots with the same colours as Adrian Shephard's, using Chaos Black for the base coat and Boltgun Metal for the highlights, then sealing it with a good coat of Citadel Colour 61-86 'Matt Varnish'.